New Ideas and Improvements

I’ve been working hard this fall to make ornaments to fill up my Etsy shop. I’m happy to have sold a good amount and to have rented more and more shop time. Now that Christmas is approaching I’ve been trying to develop new products for my shop that I can sell once ornaments season ends. One of my biggest challenges when it comes to making and selling is continuing to do so once the holiday rush is over. Last year I developed a line of vases but got caught up in moving and never got a chance to make more.

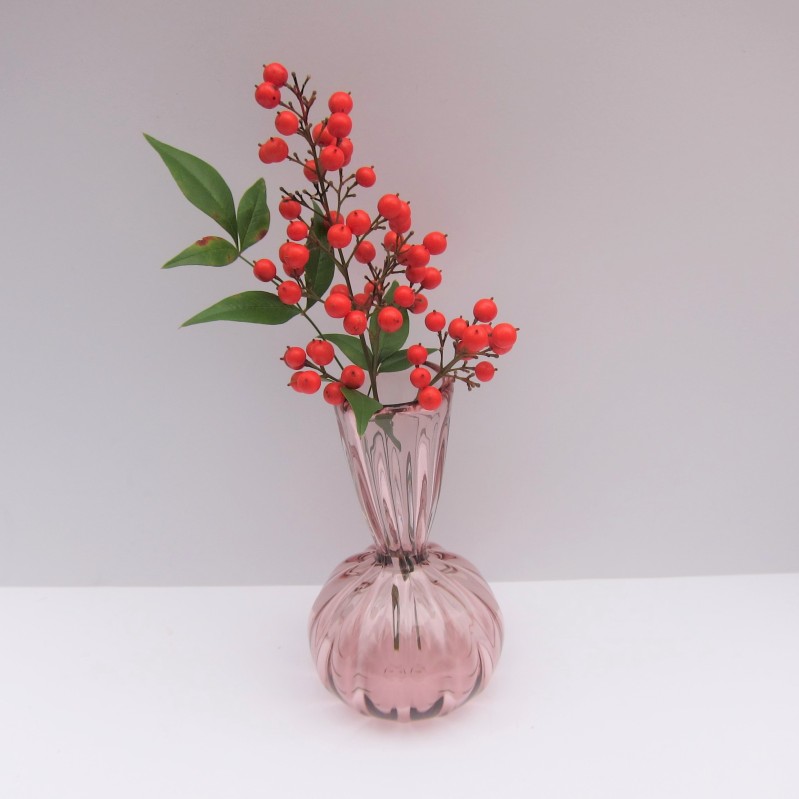
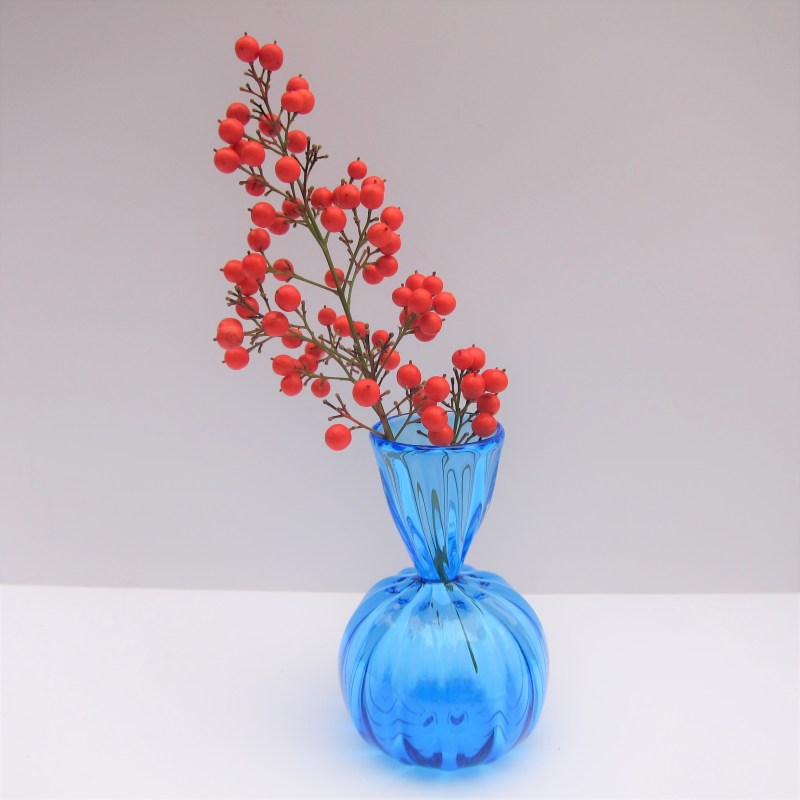
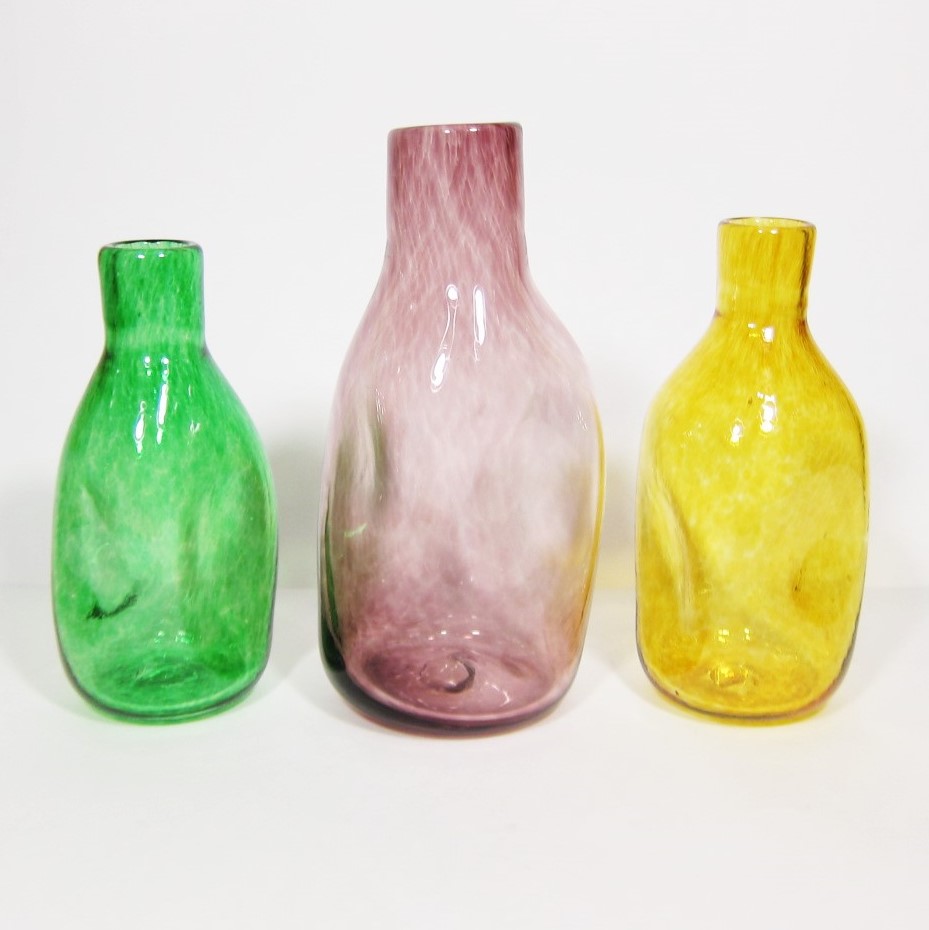
This year I’m working on a series of small and simple bud vases. I’m still drawn to bright solid colors but and am aiming for a more simple look. I’m also hoping to design some tumblers and experiment more with using cane.

hand blown glass vases purple blue ridges bud vase

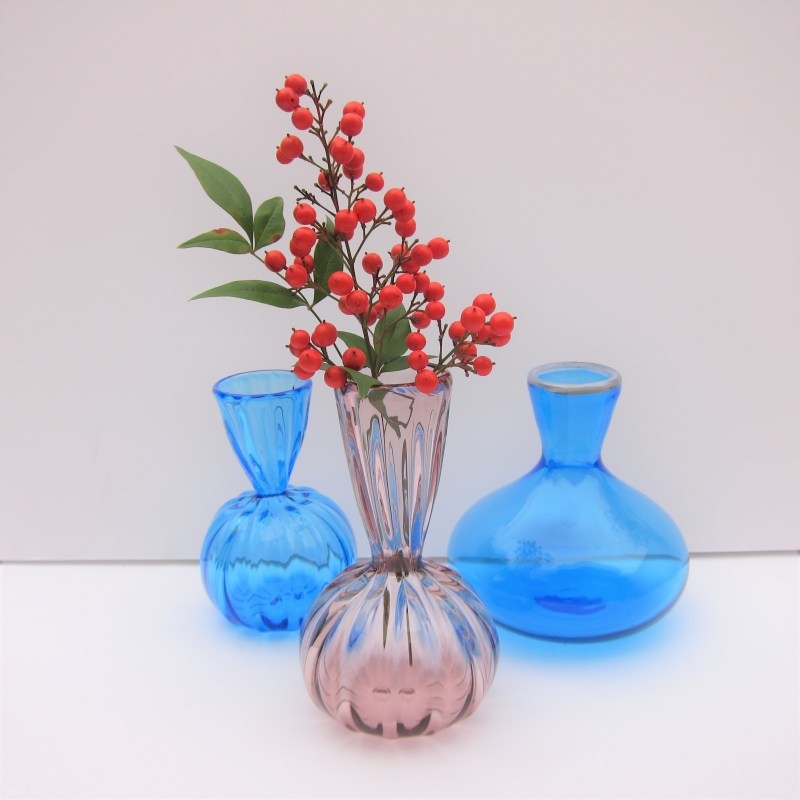
These bud vases measure only about 4 inches tall and will hold a small flower (or sprig of holly if that’s what you have).

blown glass bud vase

blown glass bud vase

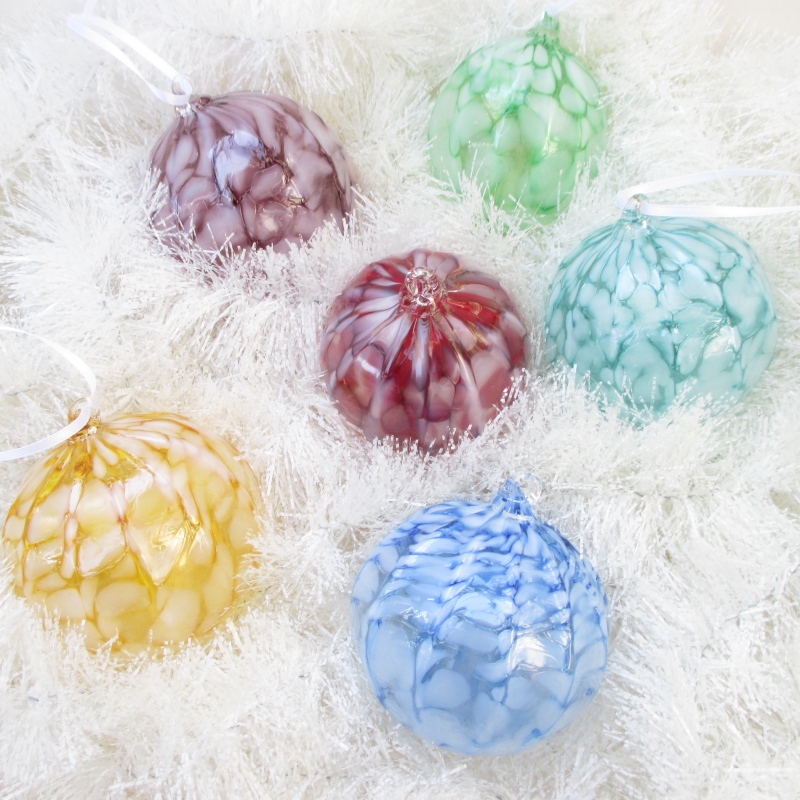
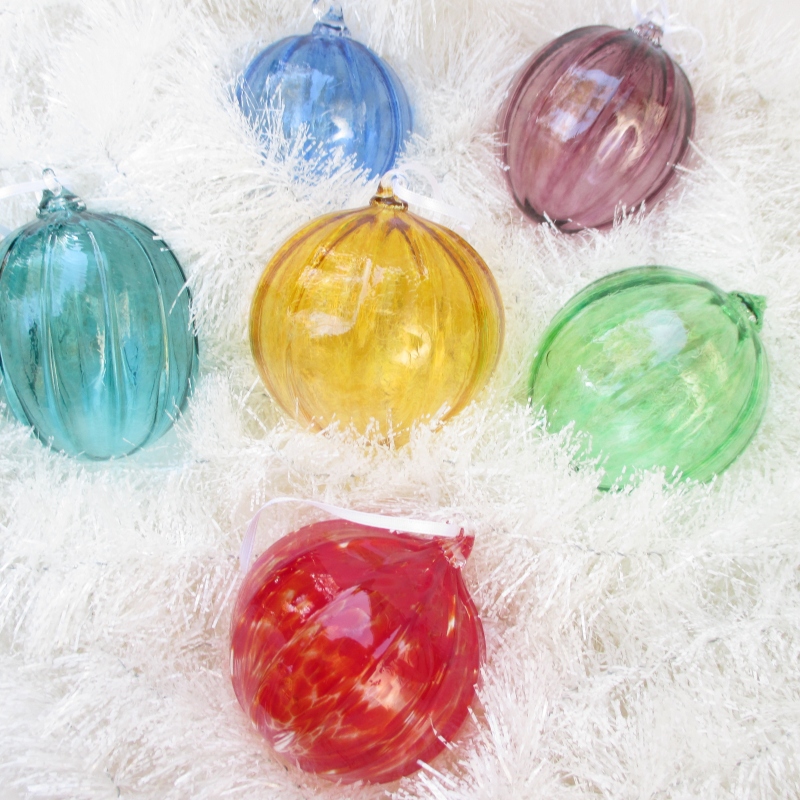
When is started making ornaments last year I realized I was out of practice and hadn’t quite gotten the hang of making ornaments that didn’t weigh a lot. I didn’t practice ornaments much in college so I spent a lot of time getting better at making them last fall. I dug out one of the first ornaments I made when I started a year ago and weighed it to see it was a beefy 4.5 ounces. I was really proud last year when I was able to get my ornaments down to around 3 ounces consistently, which is pretty nice and light. I got my most recent batch of ornaments out of the annealer yesterday and found that this year they’re even lighter, most weighing only a bit over an ounce! On the bottom is a picture of one of my first ornaments from last year and one of my most recent ones this year. What a difference a year and some practice makes!

img_7292

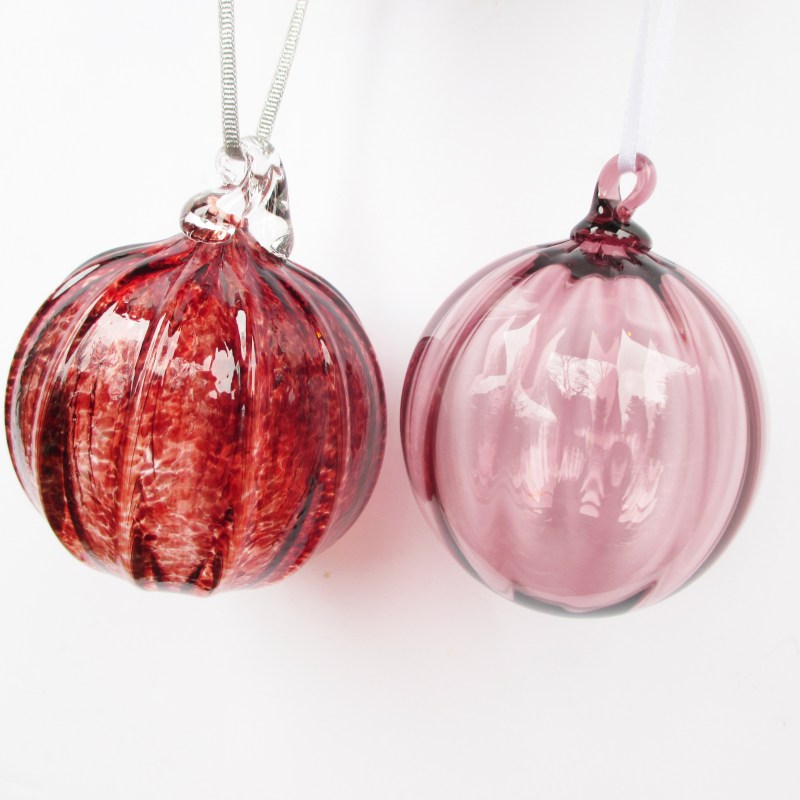
It’s not too hard to see why the one on the left weighs so much more. Luckily I’ve gotten much better at making lighter hooks.

Merry Making

Since I last posted I’ve moved, spent months growing my vintage business and am back into blowing glass regularly. The recent finds section of this blog has made a move to my new blog all about collecting vintage: Ambassador of Grooviness.

This fall I helped my old college glass group with their annual pumpkin sale and made some pumpkins to sell. I made several with this beautiful amber color that I have. When blown out on the pumpkin body it becomes this light amber color but stays a rich brown color on the stems.

blown glass pumpkins brown orange amber curly stems

But of course it wouldn’t be fall without making lots of simple orange and green pumpkins.

blown glass pumpkins orange green curly stems

I’m planning on starting earlier next year and making pumpkins in the spring or summer. I’ve always done well with seasonal items and am planning on filling my Etsy shop up with pumpkins before next fall.

When I started making ornaments again I was excited to find a box of glass color I’d completely forgotten about! Sometime before I moved last year I ordered some beautiful colors, boxed them up and completely lost track of them. I had a great time mixing colors (mostly transparent colors under white) to see how they’d look made into ornaments. I have a variety of ornaments available in my Etsy shop.

colorful hand blown glass christmas ornaments

colorful hand blown glass christmas ornaments


Inspired Vases


IMG_5858

After making ornaments and selling enough to pay for my shop time, I was really keen on designing more things to make and sell. Lately I’ve been interested in vintage, 50s and 60s style glassware (think Blenko, Pilgrim, Viking). I’ve been buying some to resell and just love the simple designs and bold colors most designs have. I checked out a few books from the library and have been researching some to find inspiration.

I had some ideas in mind for small vases I’d like to make but wanted to add some elements that would make them more unique. I decided to try crackling and pinching to add some flair to these designs. I ordered glass color a few weeks ago to use for this project. The colors I chose were mostly jewel tones. Some of them turned out better than others the first time I used them, so I have some ideas for what to change next time I go into the hot shop.


IMG_5863

Pinched vases

These pieces and more are available on Madeline Steimle Art on Etsy

Recent Finds

Last night I had a great auction haul and ended up with a good collection of vintage art glass. Most of it is green Viking glass, with a few taller amberina pieces and some super kitschy grapes.  I’ve been selling mostly jewelry lately but have been wanting to get into selling vintage glassware. Before finding this auction I’d checked out a book about mid century glass from the library and had a great time thumbing through it last night to identify some of the pieces. I ended up with around 40 pieces that I can’t wait to sort, photograph and list.


Making More Ornaments

12310700_10153731173440692_1670348492897402384_n

A few days ago I rented some more shop time. Now that I’m paying to blow glass I’m being much more careful about making things I know I can finish quickly and sell. I’ve sold a few ornaments that I made last time, so I’m hoping I can keep selling enough to buy more shop time. A few weeks ago I made my first batch of ornaments for the season. I made about 10 in two hours. This time I was able to make 20 things in the same amount of time. What’s even better though is that the ornaments I made weighed less overall. Making ornaments thin is tough! It’s something I’ve never done all that well. But with practice lately mine have been getting thinner and thinner.

I don’t have much color at the moment. I’ve been making mixes with some of the leftover frit I had from other projects and even crushing up some of the bar I had to make frit. I’ve learned a few good lessons so far about which colors interact well with each other. So far I’ve gotten a few ornaments out of the annealer that were just hideous because I didn’t know the colors would look so bad together. Once I order some more color I want to start making some vases, tumblers and other projects for after the Christmas season is over.

Here’s some photos of the ornaments I made. All are available for sale on Etsy:


Recent Finds

I had a wonderful time going to estate sales today. Since I moved I’d been relying on yard sales and was pretty dismayed that it was too cold to find many more. I went to an auction here for the first time a few weeks ago and knew it was time to start looking for tag sales. Back home most people do auctions rather than tagged estate sales, so this is a bit of a new thing for me. I’ve heard tales of long lines and large crowds at such sales but I was pleasantly surprised the sales I found today were pretty calm and there weren’t many other people there. I happened upon two that had a great stash of vintage items, particularly mid century kitchen and bar items. I bought four sets of glasses that I adore!

Here’s a picture of the whole day’s haul. I was particularly excited about the silver tree and the large and totally bizarre 18″ cat candle. It’s almost large enough to startle an actual cat.

IMG_3550

Ornament Making Madness

Ever since my pumpkin making retreat I’ve been obsessed with doing production work. Selling things I’d taken a lot of time to make was rewarding in ways I haven’t felt in a long time. I’ve been selling vintage on Ebay full time for about 2 years now and am starting to get burnt out. Since the holiday shopping rush is already going strong I’m trying to get some holiday items made while I can. A few days ago I rented shop time at the studio by my house and started making ornaments. I was able to crank out about 10 ornaments that I’ll best listing in my Etsy shop in the coming days.

WORK IN PROGRESS: PUTZ HOUSE ORNAMENTS UPDATE

So tonight I got to try out the mold I made to blow my glass putz houses. I didn’t expect it to work out on the first try  but was pleasantly surprised that my plan worked! I’ve still got some tweaking to do to the design but am very excited with how the first few turned out.

After pouring a wax of the original model I made a two part plaster mold that I could blow into.

IMG_2449

This pretty little piece of plaster coated inside with graphite is one half of the two part mold I blew into to make the house.

I tried the design in clear a few times. When my first attempts come out the annealer I can start to plan what to do differently to the finished pieces. As is the nature of glass the house ended up a bit more rounded than the original model. I like the effect but might try and find ways to make the angles of the roof show up better. I also need to decide what colors I plan to make the finished pieces in.

IMG_2447

Cat Whale Sewing Project

IMG_0958

So we recently adopted two adorable kitties. They’ve settled in pretty well but while they were still getting used to our house I decided to make them this bed to hide in. I’d seen a shark shaped cat bed on Amazon but was dismayed that the reviews said it only fit small cats. So, I found a pattern on Ebay that made a fish shaped cat bed. I was originally going to turn it into a shark but decided a whale would be better.

I used this pattern, some blue twill and cotton, stiff interfacing, poly fill and large googly eyes to make this beast of a cat bed. Yes, you can buy 5 inch googly eyes. Isn’t it a wonderful world? I deviated some from the pattern by omitting the top top fin, using googly eyes and using interfacing rather than foam. I broke about 10 needles trying to sew through all that interfacing and my cats have never once used their new whale shaped bed, but I’m still pleased with the outcome. I finished this project a few weeks ago and it seems my cats still prefer sleeping on the 50 cent carpet remnants I dragged home from a yard sale.

IMG_0999

IMG_1601

Alice and Hilda have no use for your fancy handmade cat bed!

Work in Progress: Putz House Ornaments

So in an effort to begin making more production glass I’ve started designing some ornaments. I’ve been interested in putz houses since last winter when I found a few and made a few more out of cardboard (I posted about that last year here.. They seem to have stayed pretty popular throughout the years and I bet they’d make great ornaments. I drew up a quick design in SketchUp of a simple putz house to print and take a mold of. I’ll take a plaster blow mold of it and see if I can make some blown glass ornaments using that mold. It’s going to be tricky because I’ll have to cut it off the pipe on the top edge of the roof and I’m worried about keeping the shape. When I get a chance to blow into the mold I make with this design, I might end up changing the design.

house

I ordered lagoon, copper ruby and off-white glass color to make the ornaments with and printed a model of my house the other day. The 3D printed model is only needed long enough for me to talk a flexible silicone mold that I can pour wax into. I’ll use a lost wax process to make my final mold which will be made of plaster.

IMG_2048

To take a flexible silicone mold I use clear Silicone that you find at the hardware store. It’s a cheap and easy way to make a mold of many things. It picks up good detail too. To make the mold I spray the model with mold release then build up one thin layer with the silicone. Once that’s dry I add 2 or 3 thicker layers, a blob at a time. The way I was taught to do this involves squiring each blob out into a cup of soapy water and folding it around to wash out the chemical that extends the set time, making the curing process quicker. When this is set up in a few hours I’ll pop out the model, pour in wax and have a wax model I can use to make my final mold.

IMG_2221